In this short tutorial, we will explore how Hugging Face models can be deployed in a Docker Container and exposed as a web service endpoint.
The service it exposes is a translation service from English to French and French to English.
Why someone would like to do that? Other than to learn about those specific technologies, it is a very convenient way to try and test the thousands of models that exists on Hugging Face, in a clean and isolated environment that can easily be replicated, shared or deployed elsewhere than on your local computer.
In this tutorial, you will learn how to use Docker to create a container with all the necessary code and artifacts to load Hugging Face models and to expose them as web service endpoints using Flask.
All code and configurations used to write this blog post are available in this GitHub Repository. You simply have to clone it and to run the commands listed in this tutorial to replicate the service on your local machine.
Installing Docker
The first step is to install Docker. The easiest way is by simply installing Docker Desktop which is available on MacOS, Windows and Linux.
Creating the Dockerfile
The next step is to create a new Git repository where you will create a Dockerfile. The Dockerfile is where all instructions are written that tells Docker how to create the container.
I would also strongly encourage you to install and use hadolint, which is a really good Docker linter that helps people to follow Docker best practices. There is also a plugin for VS Code if this is what you use as you development IDE.
Base image and key installs
The first thing you define in a Dockerfile is the base image to use to initialize the container. For this tutorial, we will use Ubuntu’s latest LTS:
# Use Ubuntu's current LTS
FROM ubuntu:jammy-20230804
Since we are working to create a Python web service that expose the predictions of a ML model, the next step is to add they key pieces required for the Python service. Let’s make sure that you only include what is necessary to minimize the size, and complexity, of the container as much as possible:
# Make sure to not install recommends and to clean the
# install to minimize the size of the container as much as possible.
RUN apt-get update && \
    apt-get install --no-install-recommends -y python3=3.10.6-1~22.04 && \
    apt-get install --no-install-recommends -y python3-pip=22.0.2+dfsg-1ubuntu0.3 && \
    apt-get install --no-install-recommends -y python3-venv=3.10.6-1~22.04 && \
    apt-get clean && \
    rm -rf /var/lib/apt/lists/*
This instruct Docker to install Python3, pip and venv. It also ensures that apt get cleaned of cached files, that nothing more is installed and that we define the exact version of the package we want to install. That is to ensure that we minimize the size of the container, while making sure that the container can easily be reproduced, with the exact same codebase, any time in the future.
Another thing to note: we run multiple commands with a single RUN instruction by piping them together with &&. This is to minimize the number of layers created by Docker for the container, and this is a best practice to follow when creating containers. If you don’t do this and run hadolint, then you will get warning suggesting you to refactor your Dockerfile accordingly.
Copy required files
Now that the base operating system is installed, the next step is to install all the requirements of the Python project we want to deploy in the container:
# Set the working directory within the container
WORKDIR /app

# Copy necessary files to the container
COPY requirements.txt .
COPY main.py .
COPY download_models.py .
First we define the working directory with the WORKDIR instruction. From now on, every other instruction will run from that directory in the container. We copy the local files: requirements.txt, main.py and download_models.py to the working directory.
Create virtual environment
Before doing anything with those files, we are better creating a virtual environment where to install all those dependencies. Some people may wonder why we create an environment within an environment? It is further isolation between the container and the Python application to make sure that there is no possibility of dependencies clashes. This is a good best practice to adopt.
# Create a virtual environment in the container
RUN python3 -m venv .venv

# Activate the virtual environment
ENV PATH="/app/.venv/bin:$PATH"
Install application requirements
Once the virtual environment is created and activated in the container, the next step is to install all the required dependencies in that new environment:
    # Install Python dependencies from the requirements file
RUN pip install --no-cache-dir -r requirements.txt && \
    # Get the models from Hugging Face to bake into the container
    python3 download_models.py
It runs pip install to install all the dependencies listed in requirements.txt. The dependencies are:
transformers==4.30.2
flask==2.3.3
torch==2.0.1
sacremoses==0.0.53
sentencepiece==0.1.99
Just like the Ubuntu package version, we should (have to!) pin (specify) the exact version of each dependency. This is the best way to ensure that we can reproduce this environment any time in the future and to prevent unexpected crashes because code changed in some downstream dependencies that causes issues with the code.
Downloading all models in the container
As you can see in the previous RUN command, the next step is to download all models and tokenizers in the working directory such that we bake the model’s artifacts directly in the container. That will ensures that we minimize the time it takes to initialize a container. We spend the time to download all those artifacts at build time instead of run time. The downside is that the containers will be much bigger depending on the models that are required.
The download_models.py file is a utility file used to download the Hugging Face models used by the service directly into the container. The code simply download the models and tokenizer files from Hugging Face and save them locally (in the working directory of the container):
from transformers import AutoTokenizer, AutoModelForSeq2SeqLM
import os

def download_model(model_path, model_name):
    """Download a Hugging Face model and tokenizer to the specified directory"""
    # Check if the directory already exists
    if not os.path.exists(model_path):
        # Create the directory
        os.makedirs(model_path)

    tokenizer = AutoTokenizer.from_pretrained(model_name)
    model = AutoModelForSeq2SeqLM.from_pretrained(model_name)

    # Save the model and tokenizer to the specified directory
    model.save_pretrained(model_path)
    tokenizer.save_pretrained(model_path)

# For this demo, download the English-French and French-English models
download_model('models/en_fr/', 'Helsinki-NLP/opus-mt-en-fr')
download_model('models/fr_en/', 'Helsinki-NLP/opus-mt-fr-en')
Creating the Flask translation web service endpoint
The last thing we have to do with the Dockerfile is to expose the port where the web service will be available and to tell the container what to run when it starts:
# Make port 6000 available to the world outside this container
EXPOSE 6000

ENTRYPOINT [ "python3" ]

# Run main.py when the container launches
CMD [ "main.py" ]
We expose the port 6000 to the outside world, and we tell Docker to run the python3 command with main.py. The main.py file is a very simple file that register the web service’s path using Flask, and that makes the predictions (translations in this case):
from flask import Flask, request, jsonify
from transformers import AutoTokenizer, AutoModelForSeq2SeqLM

def get_model(model_path):
    """Load a Hugging Face model and tokenizer from the specified directory"""
    tokenizer = AutoTokenizer.from_pretrained(model_path)
    model = AutoModelForSeq2SeqLM.from_pretrained(model_path)
    return model, tokenizer

# Load the models and tokenizers for each supported language
en_fr_model, en_fr_tokenizer = get_model('models/en_fr/')
fr_en_model, fr_en_tokenizer = get_model('models/fr_en/')

app = Flask(__name__)

def is_translation_supported(from_lang, to_lang):
    """Check if the specified translation is supported"""
    supported_translations = ['en_fr', 'fr_en']
    return f'{from_lang}_{to_lang}' in supported_translations

@app.route('/translate/<from_lang>/<to_lang>/', methods=['POST'])
def translate_endpoint(from_lang, to_lang):
    """Translate text from one language to another. This function is
    called when a POST request is sent to /translate/<from_lang>/<to_lang>/"""
    if not is_translation_supported(from_lang, to_lang):
        return jsonify({'error': 'Translation not supported'}), 400

    data = request.get_json()
    from_text = data.get(f'{from_lang}_text', '')

    if from_text:
        model = None
        tokenizer = None

        match from_lang:
            case 'en':
                model = en_fr_model
                tokenizer = en_fr_tokenizer
            case 'fr':
                model = fr_en_model
                tokenizer = fr_en_tokenizer

        to_text = tokenizer.decode(model.generate(tokenizer.encode(from_text, return_tensors='pt')).squeeze(), skip_special_tokens=True)

        return jsonify({f'{to_lang}_text': to_text})
    else:
        return jsonify({'error': 'Text to translate not provided'}), 400

if __name__ == '__main__':
    app.run(host='0.0.0.0', port=6000, debug=True)
Building the container
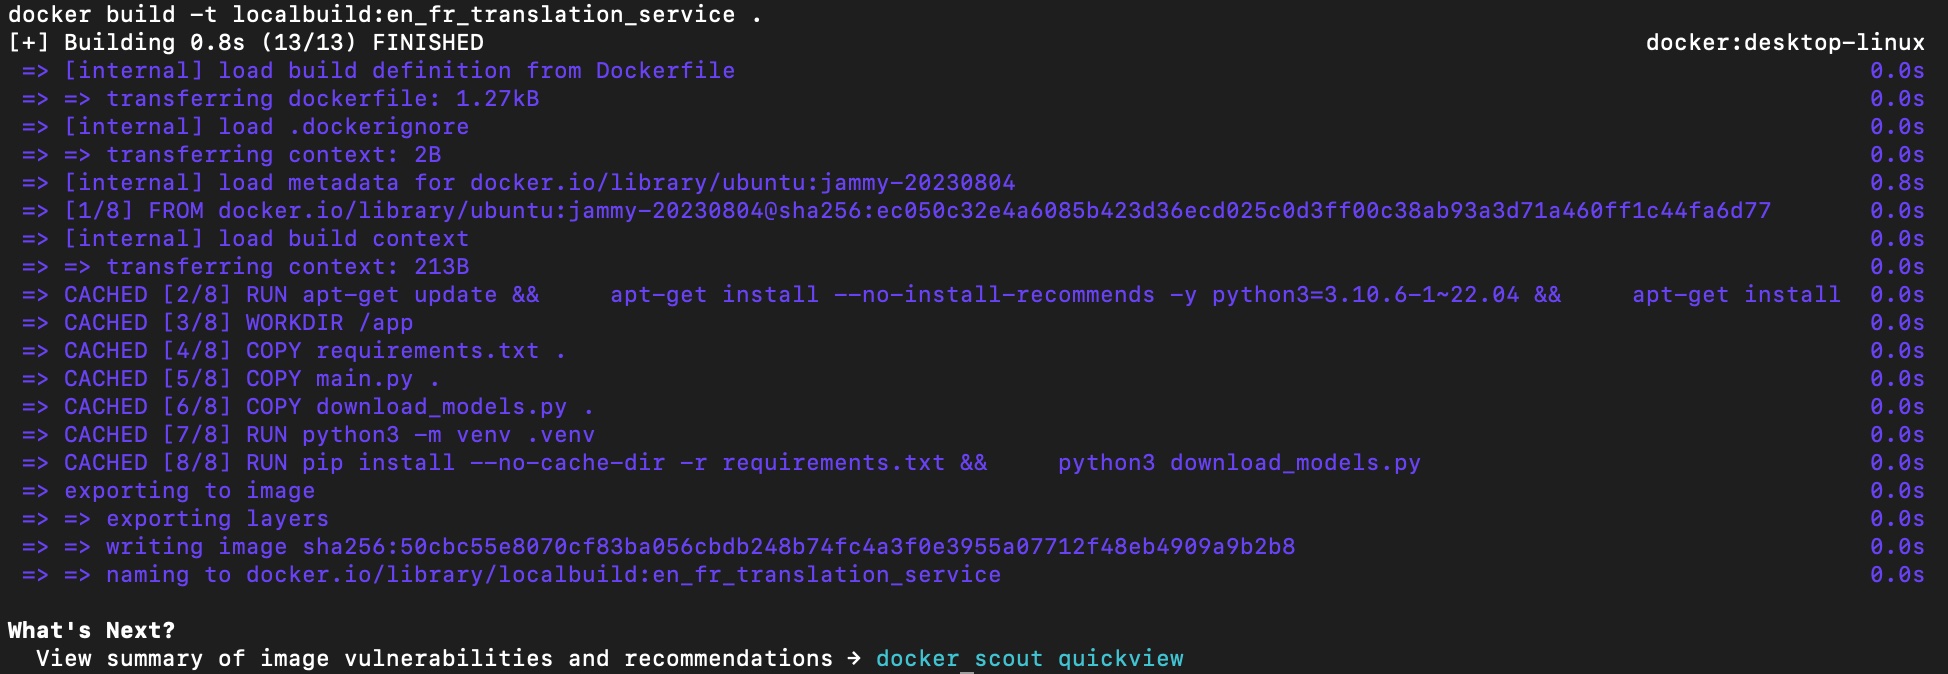
Now that the Dockerfile is completed, the next step is to use it to have Docker to build the actual image of the container. This is done using this command in the terminal:
docker build -t localbuild:en_fr_translation_service .Note that we specified a tag to make it easier to manage it in between all the other images that may exists in the environment. The output of the terminal will show every step defined in the Dockerfile, and the processing for each of those step. The final output looks like:
Running and Querying the service
Now that we have a brand new image, the next step is to test it. In this section, I will use Docker Desktop’s user interface to show how we can easily do this, but all those step can easily be done (and automated) using the docker command line application.
After you built the image, it will automatically appear in the images section of Docker Desktop:
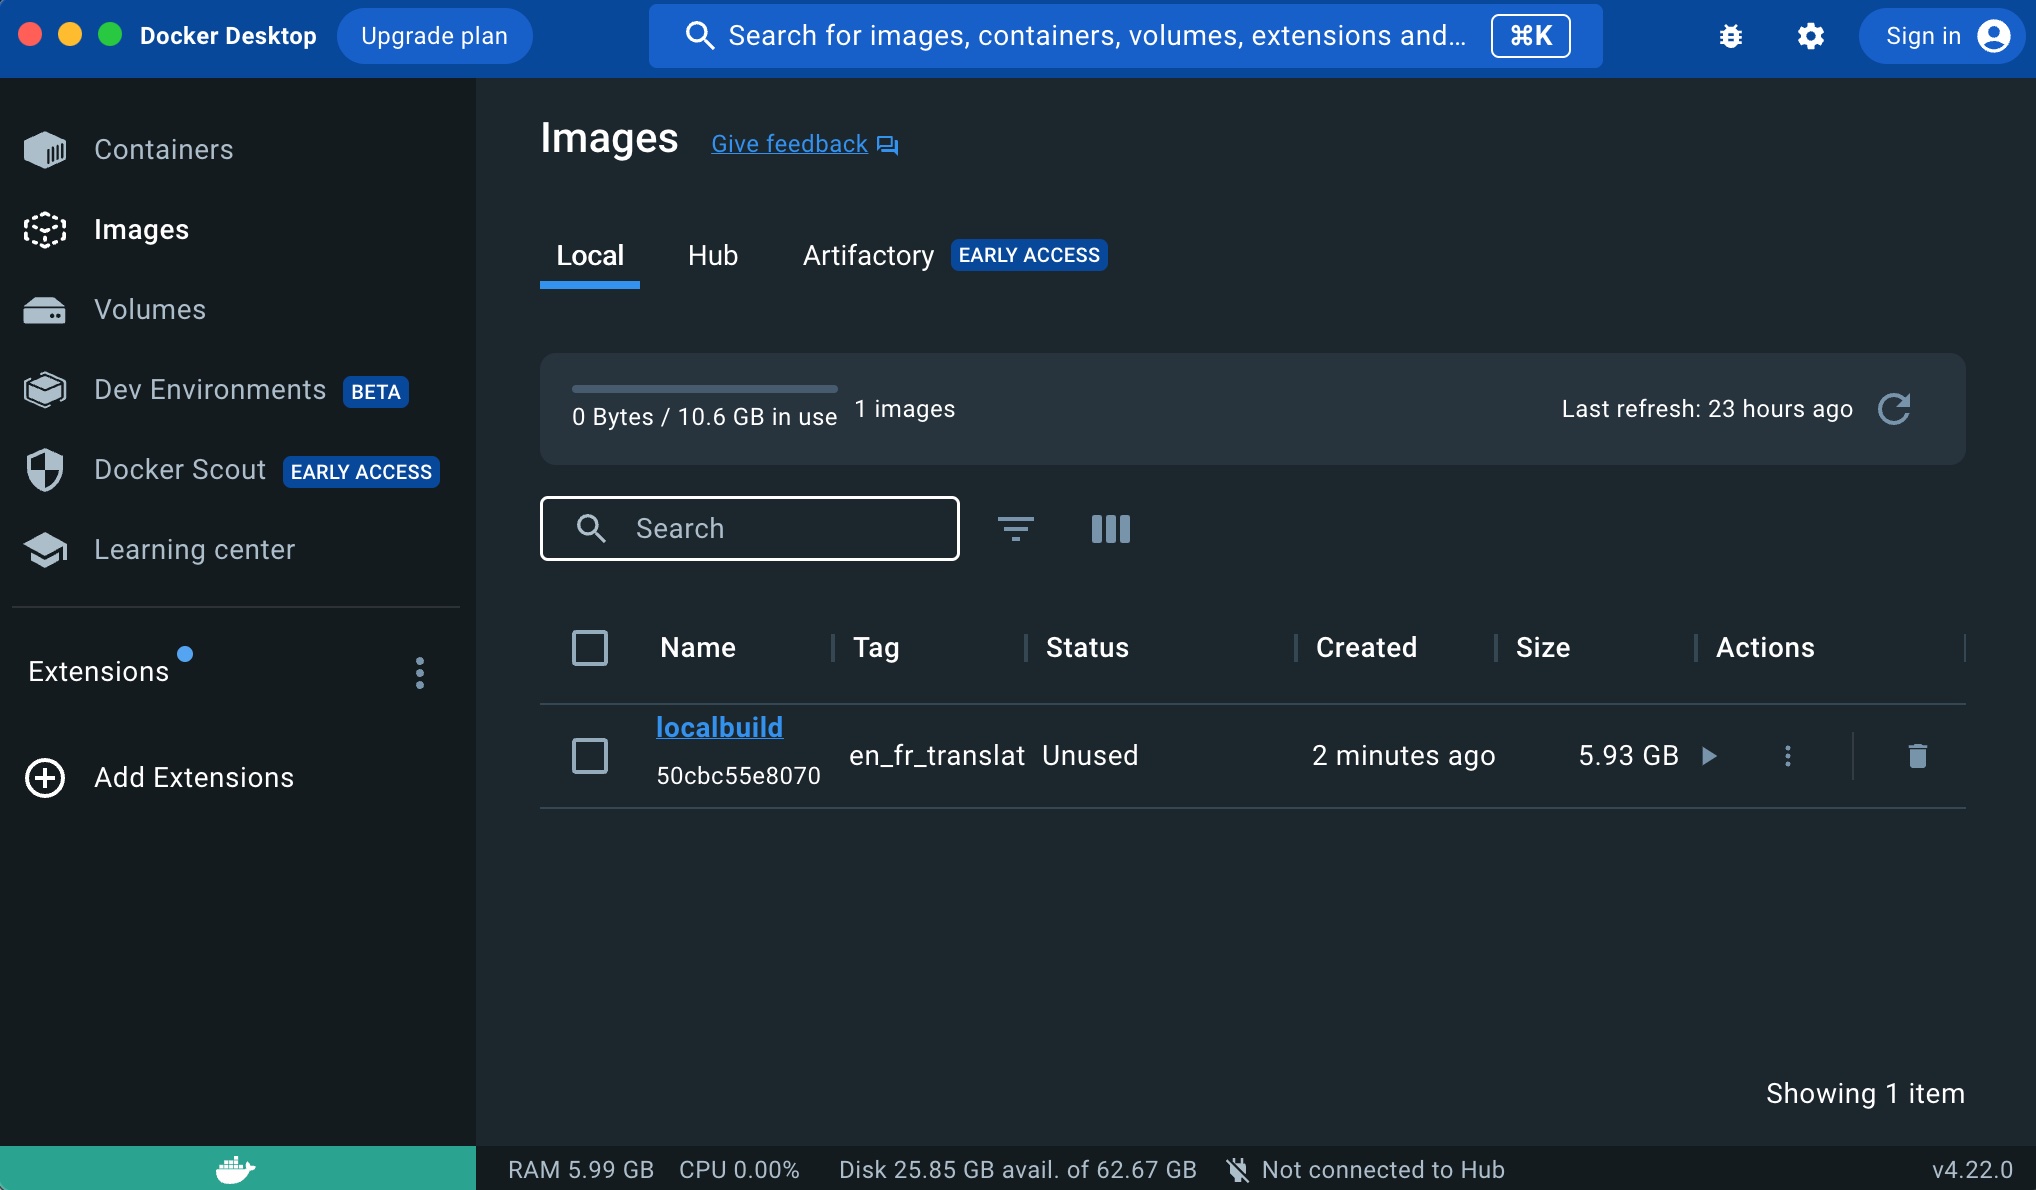
You can see the tag of the image, its size, when it was created, etc. To start the container from that image, we simply have to click the play arrow in the Actions column. That will start running a new container using that image.
Docker Desktop will enable you to add some more parameter to start the container with the following window:
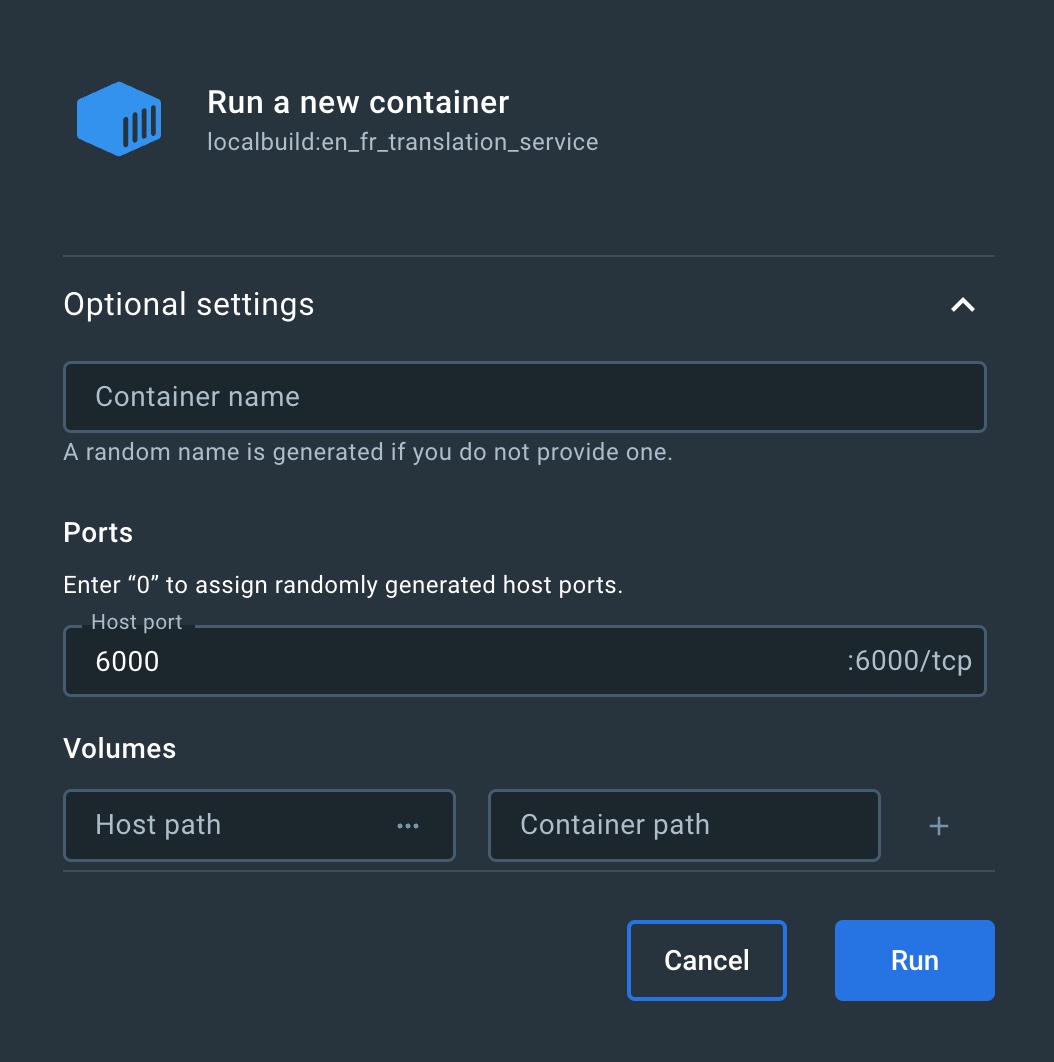
The most important thing to define here is to Host port. If you leave it empty, then the port 6000 we exposed in the Docker file will become unbound and we won’t be able to reach the service running in the container.
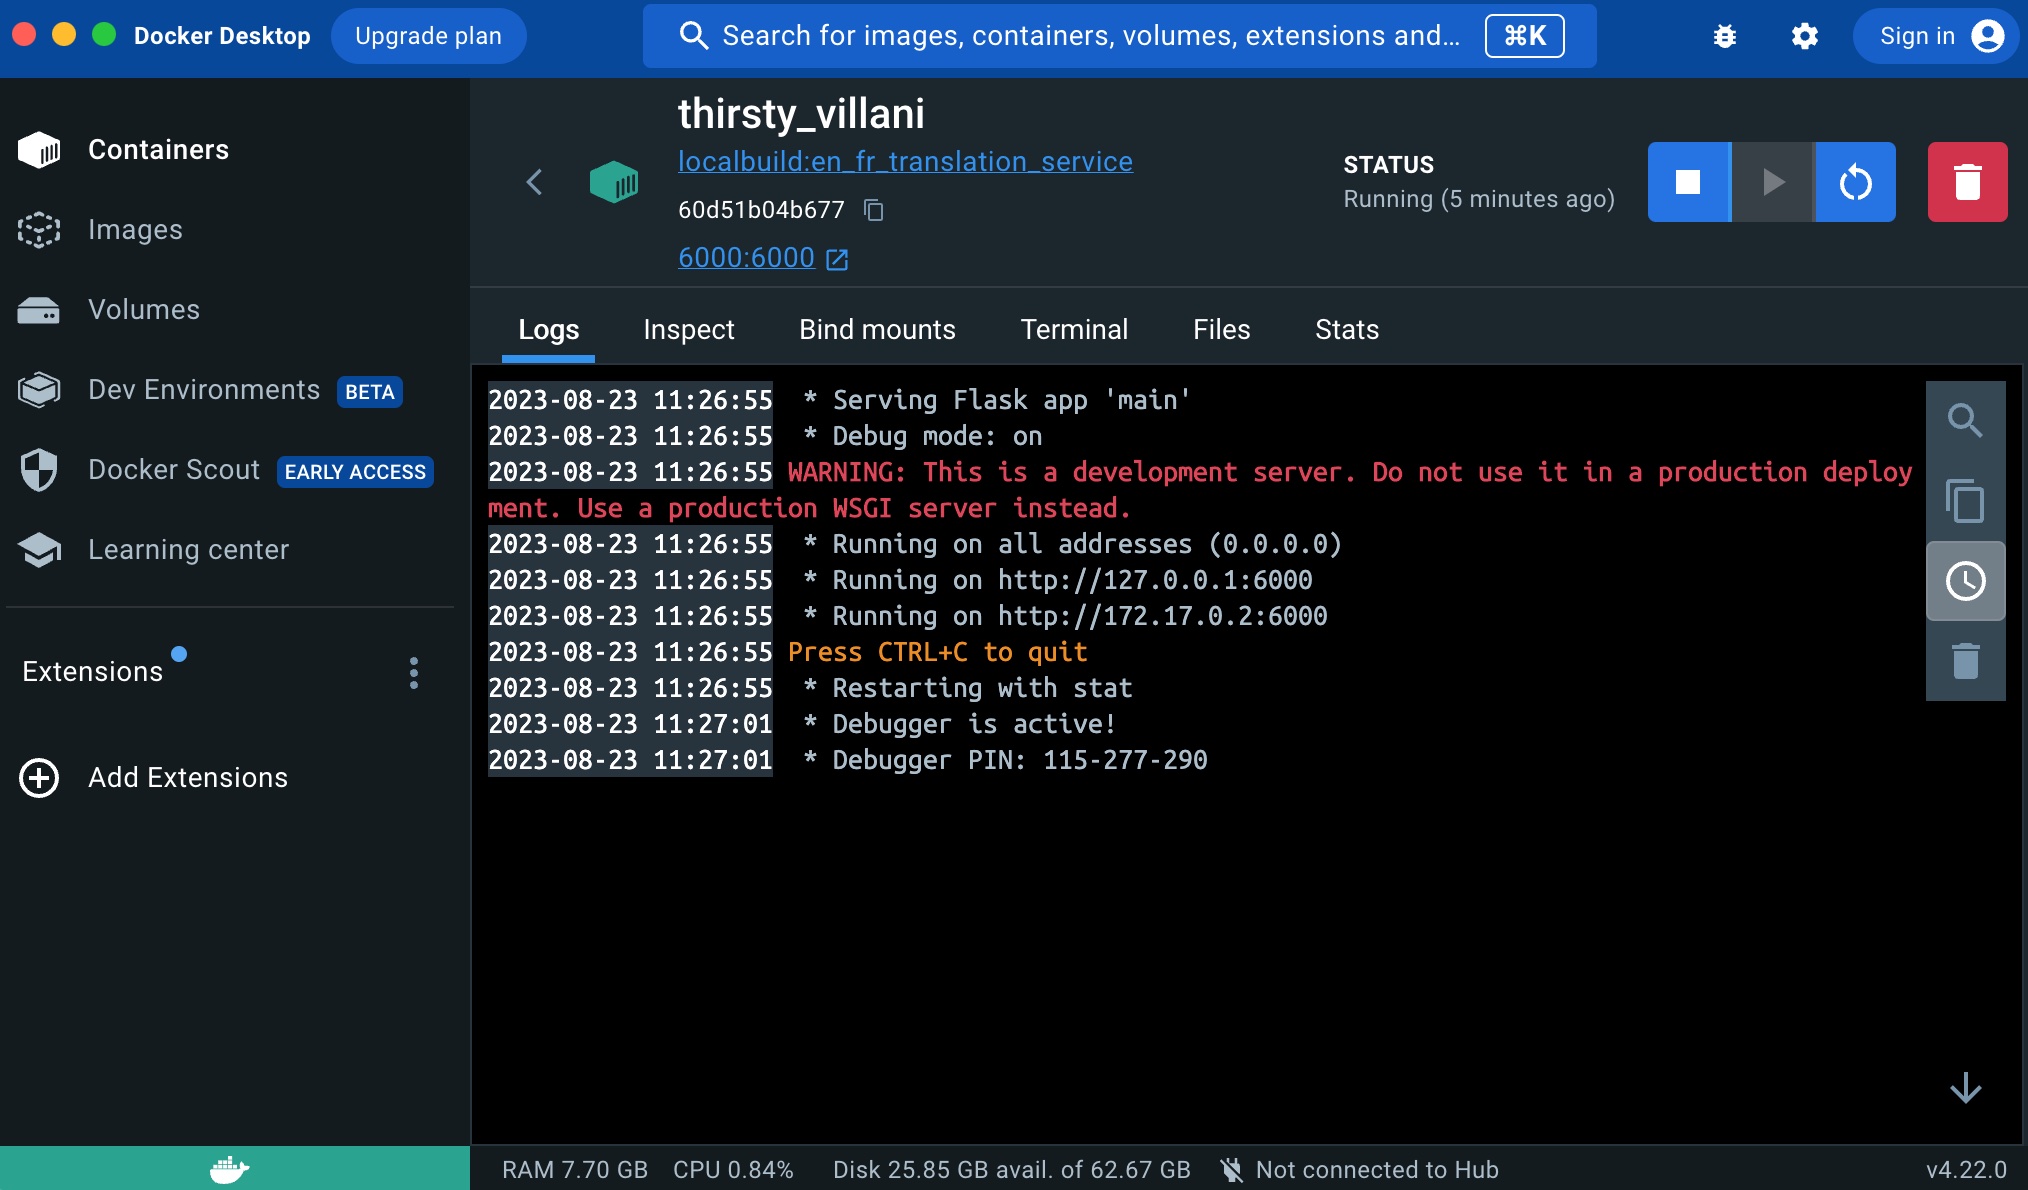
Once you click the Run button, the container will appear in the Containers section:
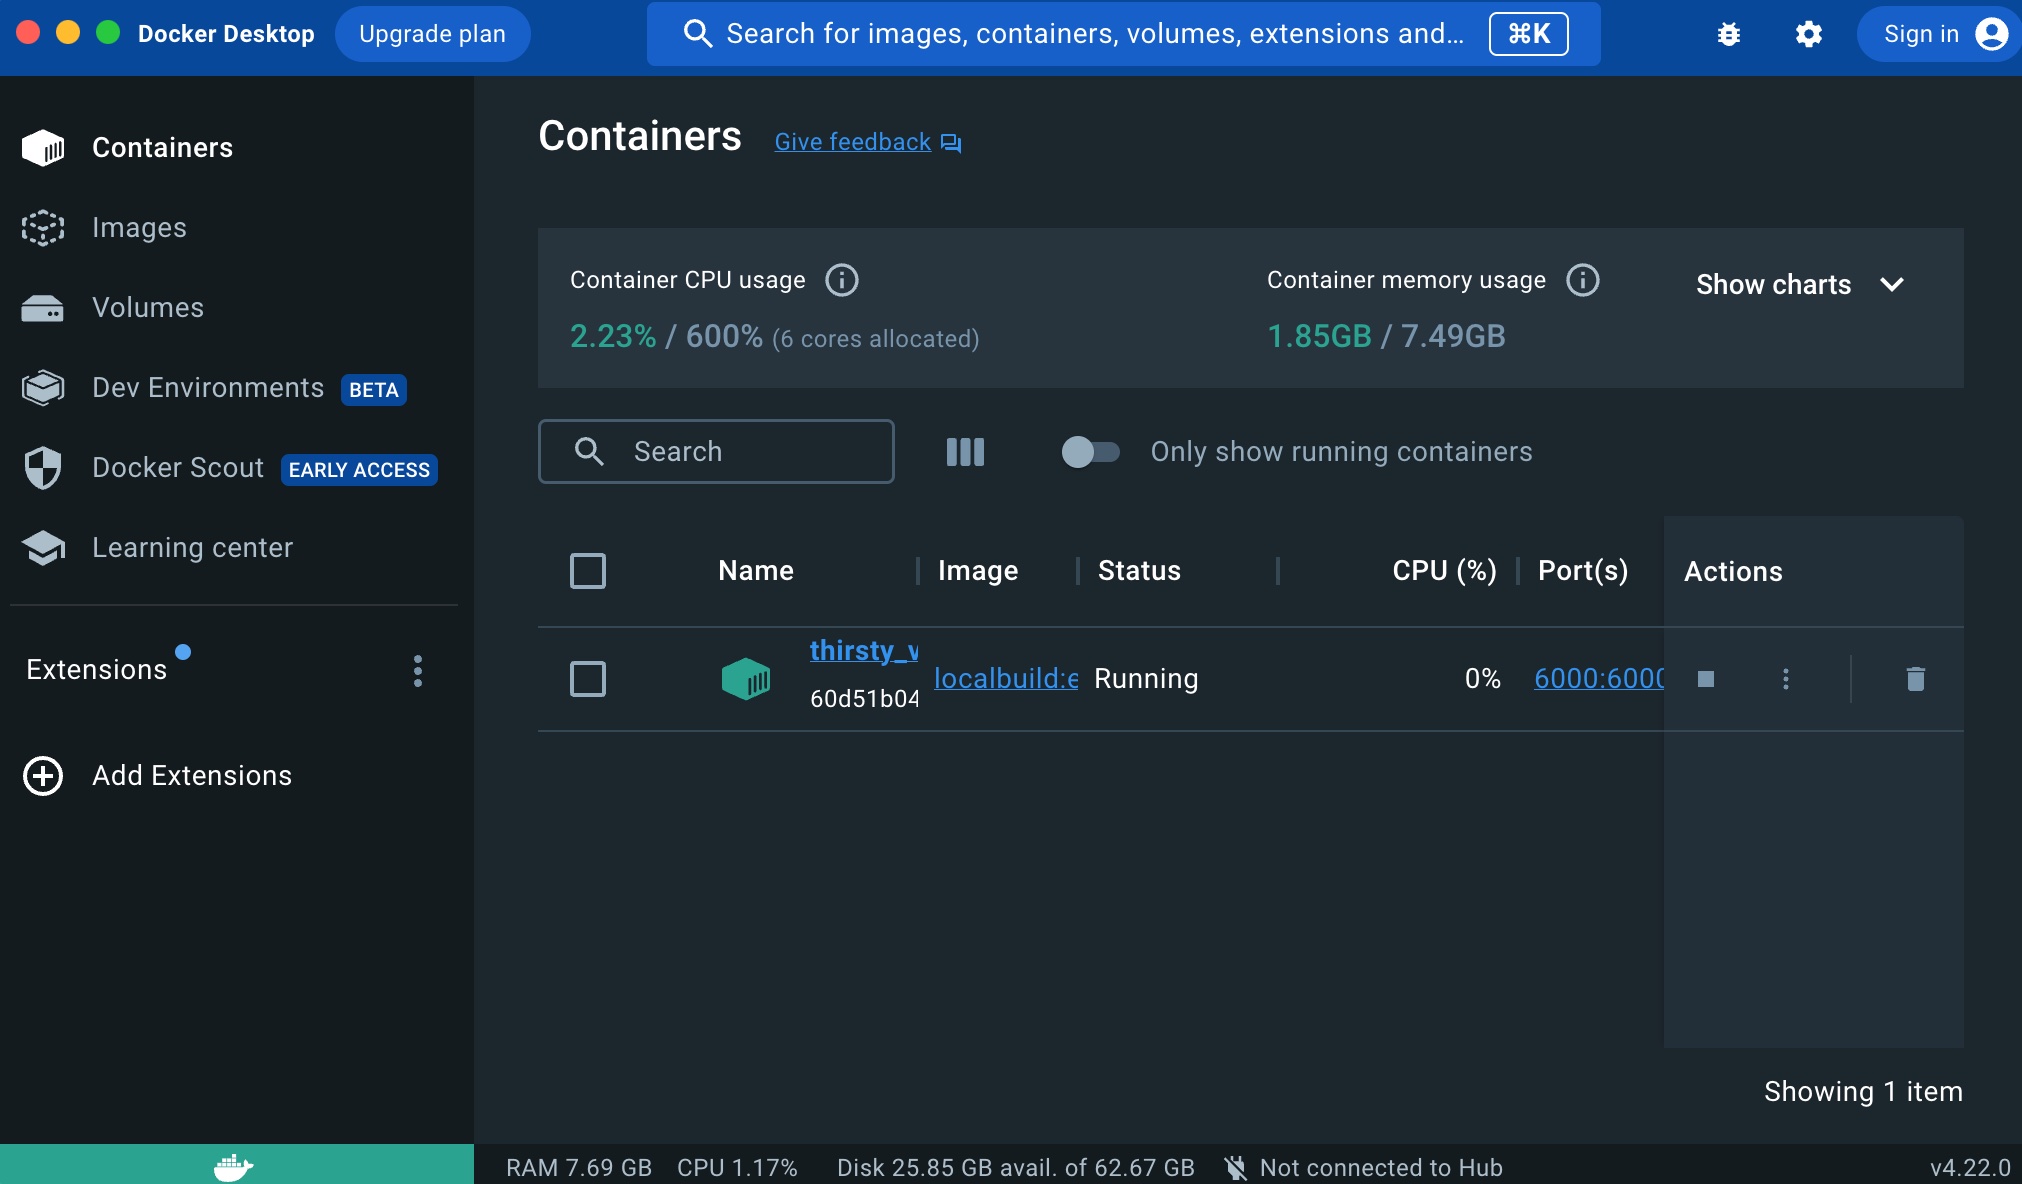
And if you click on it’s name’s link, you will have access to the internal of the container (the files it contains, the execution logs, etc.:
Now that the container is running, we can query the endpoint like this:
curl http://localhost:6000/translate/en/fr/ POST -H "Content-Type: application/json" -v -d '{"en_text": "Towards Certification of Machine Learning-Based Distributed Systems Behavior"}'It returns:
{
  "fr_text": "Vers la certification des syst\u00e8mes distribu\u00e9s fond\u00e9s sur l'apprentissage automatique"
}
And then for the French to English translation:
curl http://localhost:6000/translate/fr/en/ POST -H "Content-Type: application/json" -v -d '{"fr_text": "Ce qu'\''il y a d'\''admirable dans le bonheur des autres, c'\''est qu'\''on y croit."}'It returns:
{
  "en_text": "What is admirable in the happiness of others is that one believes in it."
}
Conclusion
As we can see, it is pretty straightforward to create simple Docker containers that turns pretty much any Hugging Face pre-trained models into a web service endpoint.
Babar
February 11, 2024 — 11:24 am
It was a great tutorial to help me go through the deployment of HuggingFace model in a Docker container. It is well explained. Great Work.